
A well-seasoned cast iron skillet is genuinely one of the great joys of cooking — naturally nonstick, indestructible, and better every year you own it. A badly seasoned one is a rusty, sticky paperweight that makes you want to throw it through a window. If you’re wondering what the best way to season a cast iron skillet is, whether it’s brand new, thrifted, or a family heirloom that’s seen better days, here’s the complete process that actually works.
First, a quick demystification: “seasoning” isn’t a flavor. It’s a layer of polymerized oil — oil that’s been heated past its smoke point until it bonds to the iron as a hard, slick coating. Every time you cook with fat in the skillet, you add microscopic layers. The oven method below just fast-forwards that process.
What Is the Best Way to Season a Cast Iron Skillet? The Oven Method
This is the method recommended by manufacturers and restorers alike. It takes about an hour of mostly hands-off time.
Step 1: Start with a clean, dry skillet
If it’s new, wash it with hot soapy water to remove the factory coating — yes, soap is fine here, despite the myths (more on that later). If it’s old and rusty, scrub the rust off first with steel wool or a chainmail scrubber until you’re down to bare metal. For heavy rust, a 50/50 white vinegar and water soak for 1–2 hours helps, but don’t soak longer — vinegar eats iron too.
Dry it completely. Then dry it again. Water is the enemy. Put it on a warm burner for a few minutes to evaporate every last drop, and let it cool just enough to handle.
Step 2: Apply the thinnest possible coat of oil
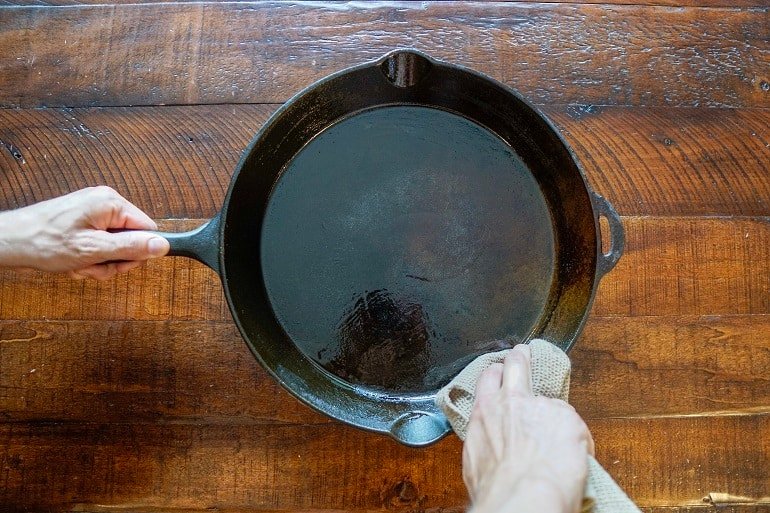
This is where most people go wrong — they use too much oil, which bakes into a sticky, gummy mess instead of a hard seasoning layer. Rub the entire skillet (inside, outside, handle) with a high-smoke-point oil: refined canola, grapeseed, or vegetable shortening are all excellent. Then — and this is the key — wipe it all off like you made a mistake and you’re trying to remove it. What remains is the microscopic film you want. The skillet should look dry, not shiny.
Step 3: Bake it upside down
Heat your oven to 450–500°F (above the oil’s smoke point — that’s what triggers polymerization). Place the skillet upside down on the middle rack with foil on the lower rack to catch drips. Bake for one hour.
Step 4: Cool and repeat
Let the skillet cool in the oven. That’s one layer. For a new or stripped skillet, repeat the oil-and-bake cycle 2–3 times. Each layer builds on the last. You won’t get a mirror finish in one afternoon — real seasoning builds over months of cooking — but 3 oven layers give you a genuinely functional starting point.
Maintaining the Seasoning (The Part That Actually Matters)
Here’s the truth the internet argues about endlessly: the oven method gets you started, but cooking is what builds great seasoning. Use your skillet regularly with fats — searing steaks, frying eggs in butter, making cornbread, roasting vegetables in oil. Every session adds layers.
Daily care rules:
- Clean while warm. Hot water and a stiff brush or chainmail scrubber handle 95% of messes.
- Soap is fine. Modern dish soap doesn’t contain the lye that stripped seasoning a century ago. A little soap won’t hurt a well-seasoned pan — Lodge themselves confirm this. Just don’t soak it or run it through the dishwasher.
- Dry immediately and thoroughly. Towel dry, then heat on the burner for a minute to evaporate residual moisture.
- Oil lightly after drying. While it’s still warm, rub in a few drops of oil with a paper towel. This prevents rust between uses.
- Store dry. If stacking, put a paper towel or cloth between pans to protect the seasoning.
What to Cook (and Avoid) in New Seasoning
For the first few weeks, favor fatty foods: bacon, fried chicken, grilled cheese, roasted vegetables, cornbread. These build seasoning fast. Go easy on highly acidic foods (tomato sauce simmered for hours, wine reductions) until the seasoning is well established — a quick tomato sauté is fine, but a three-hour marinara can strip young seasoning. Eggs are the ultimate test; if they stick a little at first, use more butter and give it time. Within a month or two of regular use, you’ll be sliding omelets around like a diner cook — speaking of which, my guide to fluffy diner-style scrambled eggs is a great way to break in a fresh skillet.
Rescuing a Ruined Skillet
Rust? Sticky gummy buildup? A skillet left outside for a year? Almost all of it is fixable — that’s the beauty of cast iron. For light rust, scrub with steel wool and re-season. For a gummy, sticky pan (too much oil in previous seasoning attempts), scrub it down hard or run it through a self-cleaning oven cycle to strip it to bare metal, then start the oven method fresh. I’ve restored skillets that looked like archaeological finds. Unless it’s cracked or warped badly, it’s salvageable.
Cast Iron vs. Everything Else
Why bother, when nonstick is easier? Because a $30 cast iron skillet sears better than a $200 nonstick pan, lasts literally generations, and goes from stovetop to oven to grill to campfire. It’s the most versatile pan in most kitchens. Pair it with crispy oven fries or a big lasagna and you’ll understand the cult following.
The Practical Takeaway
The best way to season a cast iron skillet: scrub it clean, dry it completely, wipe on the thinnest possible film of high-smoke-point oil, bake upside down at 450–500°F for an hour, and repeat 2–3 times. Then just cook with it — fatty foods, regular use, dry it well, light oil after. That’s the whole religion.
Do that, and in six months you’ll have a pan your grandkids will fight over.
How Often Should You Re-Season?
With normal use and decent care, you may never need a full oven re-seasoning again. The cooking itself maintains the layers. Re-season from scratch only when the seasoning is genuinely damaged — flaking off in patches, widespread rust, or that sticky gummy texture from too much oil. For minor dull spots or light sticking, just do a single stovetop touch-up: heat the pan, wipe in a whisper-thin coat of oil, heat until it just starts to smoke, let it cool. Two minutes of work, good as new. Think of oven seasoning as the foundation pour and everyday cooking as the maintenance — most of the building happens while you’re just making dinner.


