
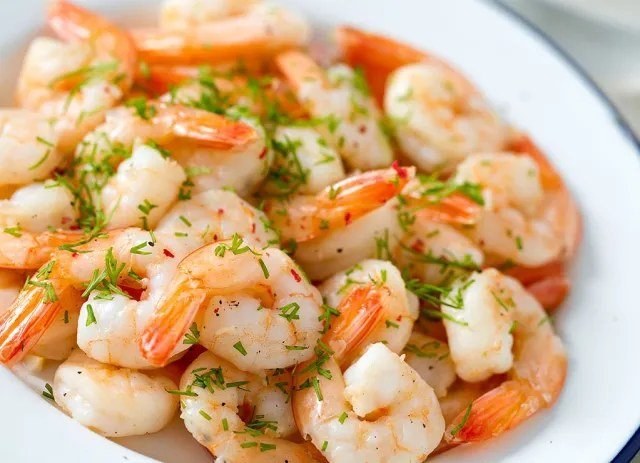
Shrimp goes from perfectly tender to sad, rubbery pencil erasers in about 60 seconds. It’s one of the least forgiving proteins in the kitchen — which is ironic, because it’s also one of the fastest and easiest when you know what you’re doing. If you’ve been wondering how to cook shrimp without overcooking it, the answer is mostly about heat control, timing, and learning to read the visual cues. Get those right and you’ll get snappy, juicy, sweet shrimp every time.
Here’s the fundamental thing to understand: shrimp cook incredibly fast because they’re small and lean. There’s no “low and slow” with shrimp. Every method is some version of hot-and-fast, and the window between done and overdone is narrow. That’s actually good news — it means shrimp dinner is 10 minutes away, always.
How to Cook Shrimp Without Overcooking It: The Universal Rules
Rule 1: Learn the visual cues
Raw shrimp is translucent gray-blue. As it cooks, it turns pink and opaque, and the shape changes from straight to a gentle C. The C-shape rule: a gentle C = perfectly cooked. A tight O (curled into a full circle) = overcooked. This is the most reliable doneness test across all methods, and it works in seconds. When shrimp hit the C-shape with just a hint of translucency left in the very center, pull them — carryover heat finishes the job.
Rule 2: Use high heat and short times
Shrimp want a hot pan, not a warm one. Medium-high to high heat, 1–2 minutes per side for medium shrimp, and you’re done. The biggest mistake is treating shrimp like chicken — moderate heat, long cook, checking repeatedly. Every extra 30 seconds past done is a step toward rubber.
Rule 3: Don’t crowd the pan
Crowded shrimp steam instead of sear, which means they cook unevenly and slowly — the worst of both worlds. Single layer, space between each one. Cook in batches if needed; each batch takes 3 minutes.
Rule 4: Prep everything before the shrimp hits heat
Because the cooking takes minutes, there’s no time to chop garlic mid-cook. Mise en place isn’t fussy here — it’s survival. Have your garlic minced, lemon cut, butter ready, and serving plate nearby before the pan gets hot.
Rule 5: Thaw properly
Cooking from frozen is possible but tricky — the outside overcooks before the inside thaws. Best method: sealed bag under cold running water for 15–20 minutes. Then pat very dry. Wet shrimp steam; dry shrimp sear. My freezing and thawing guide covers the food-safety side.
Method 1: Pan-Searing (The Weeknight Go-To)
Pat shrimp completely dry, season with salt and pepper. Heat a skillet over medium-high with a tablespoon of oil until shimmering. Lay shrimp in a single layer — don’t touch them for 90 seconds. Flip, cook 60–90 seconds more until C-shaped and pink. Optional finish: add butter, minced garlic, and a squeeze of lemon in the last 30 seconds, tossing to coat. Total: under 5 minutes. This is the method behind classic shrimp scampi, garlic butter shrimp, and about a thousand restaurant appetizers.
Method 2: Grilling (Smoky and Fast)
Thread shrimp on skewers (or use a grill basket — shrimp fall through grates). Oil and season, grill over direct high heat 2 minutes per side. The char adds incredible flavor. Soak wooden skewers 30 minutes first so they don’t burn. Grilled shrimp with a squeeze of lime and some taco fixings is a top-tier summer dinner.
Method 3: Poaching (The Gentlest Method)
Bring well-seasoned water or court-bouillon (water + lemon, bay, peppercorns) to a bare simmer — not a boil. Add shrimp, cook 2–3 minutes until pink, then immediately transfer to an ice bath to stop the cooking. This is the method for shrimp cocktail and salads, where you want pure, clean shrimp flavor and tender texture. The ice bath is non-negotiable — without it, carryover cooking ruins them.
Method 4: Roasting (Hands-Off)
Toss shrimp with oil, salt, and seasonings on a sheet pan. Roast at 400°F for 6–8 minutes, flipping once. Slightly more forgiving than searing because the heat is less intense, and great for large batches. Finish under the broiler for 1 minute if you want charred edges.
Buying and Prepping Shrimp Right
Size matters: larger shrimp (16/20 or 21/25 count per pound) are more forgiving than tiny ones — the overcooking window is wider. Shell on vs. off: shell-on shrimp stay juicier and more flavorful (the shells protect the meat), but they’re messier to eat. For most weeknight cooking, peeled and deveined is the practical choice. Deveining: that dark line is the digestive tract — harmless but gritty. Butterfly them (cut along the back, remove the vein) for the prettiest presentation; butterflied shrimp also cook a touch faster and hold sauces better. Fresh vs. frozen: unless you live near the coast, frozen shrimp (frozen at sea) is often better than the “fresh” stuff that’s been sitting on ice for days.
Troubleshooting
- Rubbery: Overcooked. Next time, pull them 30–60 seconds earlier. Remember the C, not the O.
- Bland: Under-seasoned or cooked from wet. Dry them, salt them, and don’t be shy with garlic, lemon, and butter.
- Uneven cooking: Crowded pan, or mixed sizes. Single layer, uniform size.
- Sticking to the pan: Pan wasn’t hot enough, or you moved them too soon. Let the sear form before flipping.
Serving Ideas
Perfectly cooked shrimp are endlessly versatile: over pasta with garlic butter, in tacos with slaw and lime, on top of a grain bowl, in a bright lemon-dressed salad, or simply chilled with cocktail sauce. They also cook in the time it takes to boil pasta — shrimp scampi linguine is a 20-minute dinner that tastes like a restaurant.
The Practical Takeaway
Shrimp without overcooking = hot pan + single layer + 1–2 minutes per side + pull at the gentle C-shape with a hint of translucency + carryover does the rest. Prep everything first, don’t crowd, don’t walk away.
It’s a 5-minute protein that eats like a luxury. Once you nail the timing, shrimp becomes the fastest impressive dinner in your rotation.
For buying, thawing, and handling shrimp safely, Seafood Health Facts (from Oregon State University) is an excellent science-based resource.


