
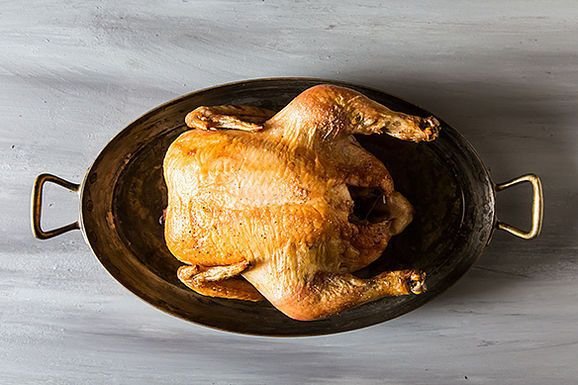
Cutting into a chicken breast to “check if it’s done” is something we’ve all done — and it’s also the fastest way to turn juicy chicken into dry chicken, since all the juices run out onto the cutting board. If you’ve ever wondered how to tell when chicken is fully cooked without destroying it, the answer is simpler and more reliable than the old tricks: use a thermometer. But there are also backup methods worth knowing, because thermometers get lost, batteries die, and sometimes you’re cooking at someone else’s house.
Here’s why this matters beyond texture: undercooked chicken can carry salmonella and campylobacter, and those aren’t minor stomach aches. Getting doneness right is genuinely a food safety issue, not just a culinary preference. The good news is that once you know the numbers, it’s foolproof.
How to Tell When Chicken Is Fully Cooked: The Thermometer Method
An instant-read thermometer is the single best $15 you’ll spend on your kitchen. Here’s how to use it right:
- The magic number is 165°F (74°C) for all poultry — breasts, thighs, wings, whole birds, ground chicken. This is the USDA’s recommended safe internal temperature, and it’s non-negotiable.
- Measure the thickest part, away from bone (bone conducts heat differently and gives false readings).
- For a whole chicken, check the inner thigh — the slowest-cooking spot. If that’s 165°F, everything else is done.
- For thin cutlets, insert the probe horizontally from the side to get the probe tip into the center.
- Wait for the reading to stabilize — a few seconds — before trusting it.
One nuance worth knowing: carryover cooking. Chicken’s internal temperature keeps rising 3–5°F after you take it off the heat. Many experienced cooks pull breasts at 160°F and let carryover finish the job during a 5-minute rest. That rest also redistributes the juices, so the chicken stays moist. But if you’re new to this or cooking for anyone immunocompromised, pregnant, or very young, just go straight to 165°F — the safety margin is worth more than marginal juiciness.
Backup Methods When You Don’t Have a Thermometer
These are less precise, but they work in a pinch:
The juice test
Pierce the thickest part with a knife or skewer. The juices should run completely clear — no pink, no red tinge. If there’s any pink in the juice, it needs more time. This is the classic method and it’s reasonably reliable for pieces, though harder to read on a whole bird.
The color check
Cut into the thickest part and look at the meat. It should be opaque white (breast) or opaque with no pink (thighs and legs can have a slight pinkish hue near the bone even when fully cooked, which confuses people — that’s a harmless reaction between the bone marrow and heat, not undercooking). The texture should be firm, not rubbery-translucent.
The touch test
Press the meat with your finger or tongs. Raw chicken feels soft and squishy; fully cooked chicken springs back firmly. This takes practice to calibrate, so use it as a secondary check, not your primary one.
Time and temperature guidelines
As a rough reference at common oven temps: boneless breasts (6 oz) take 20–25 minutes at 400°F; bone-in thighs take 35–40 minutes at 400°F; a 4-lb whole chicken takes about 1 hour 15 minutes at 425°F. But ovens vary wildly — treat times as estimates and verify with one of the methods above.
Common Mistakes That Lead to Unsafe or Dry Chicken
- Cooking from uneven thickness: A chicken breast is thick on one end and thin on the other, so the thin end dries out before the thick end cooks. Fix it by pounding the breast to even thickness (put it in a zip-top bag and whack it with a pan) — five minutes of prep, dramatically better results.
- Not resting the meat: Cutting immediately lets juices flood out. Rest breasts 5 minutes, whole birds 15–20 minutes.
- Relying on “no pink” alone near bones: As mentioned, bone-in thighs can look pinkish when perfectly safe. Trust the thermometer here.
- Thawing on the counter: The outside enters the bacterial danger zone while the inside is still frozen. Thaw in the fridge overnight, or use the cold-water method if you’re in a hurry. My guide to freezing leftovers safely covers thawing rules that apply here too.
- Washing raw chicken: Don’t. It splatters bacteria around your sink and does nothing to make the chicken safer. Cooking to 165°F is what kills pathogens.
Special Cases: Ground Chicken, Stuffed Chicken, Reheated Chicken
Ground chicken needs 165°F throughout with no exceptions — grinding distributes surface bacteria through the whole mass, so there’s no “medium rare” option. Stuffed chicken breasts or whole birds need the stuffing itself to hit 165°F, which often means the meat overcooks — honestly, cooking stuffing separately is better in every way. Reheated chicken should hit 165°F again when reheated; microwaves heat unevenly, so stir or rotate halfway.
Making Chicken Worth Cooking Right
Once you’ve got doneness dialed in, the flavor side is easy. A good chicken marinade for maximum flavor makes even simple breasts taste like a restaurant dish, and proper seasoning technique (salt early, not just at the end) matters more than most people realize.
The Practical Takeaway
How to tell when chicken is fully cooked: buy an instant-read thermometer, aim for 165°F in the thickest part away from bone, and let it rest before cutting. Back it up with the clear-juice and firm-touch checks when you need to. It’s a tiny investment of money and habit for chicken that’s both safe and juicy every single time.
Stop cutting your chicken open to check. Your dinners will thank you.
Choosing a Thermometer (Quick Buying Guide)
Not all thermometers are equal. An instant-read digital thermometer ($15–30) is the one to buy — it gives a reading in 2–3 seconds and works for everything from chicken to bread to candy. Avoid the old dial thermometers; they’re slow and often off by 10 degrees or more. If you roast whole birds often, a leave-in probe thermometer with an oven-safe cable is wonderful — set the target temp, and it beeps when you’re there. Whichever you buy, test it once a year in ice water (it should read 32°F) and adjust or replace if it’s off. A thermometer you can’t trust is worse than none at all, because it gives you false confidence.


