
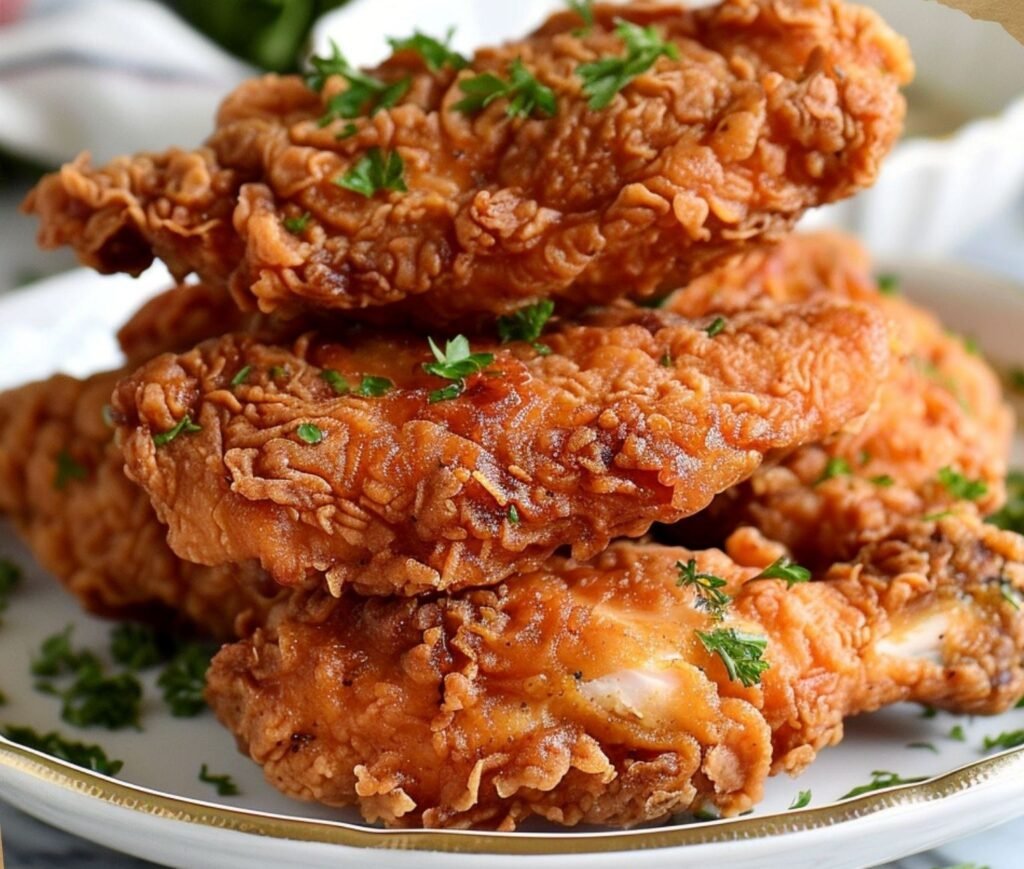
There’s fried chicken, and then there’s shatteringly crispy fried chicken — the kind where the crust crackles audibly and stays crunchy long after frying. Restaurant versions seem like magic, but the techniques are straightforward. So how do I make crispy fried chicken at home that actually stays crispy? It comes down to four things: a proper brine, a craggy dredge, correct oil temperature, and resting it right. Here’s the full method.
The Brine: Where Juiciness Begins
Crispy crust means nothing on dry meat. Brining solves that:
- Buttermilk brine (best): submerge chicken pieces in buttermilk with 1 tablespoon salt per quart, plus hot sauce if you like heat. 4–12 hours in the fridge (overnight is ideal). The acidity tenderizes gently; the salt seasons deeply.
- Dry brine (easiest): salt the chicken generously (1 tsp kosher salt per pound), refrigerate uncovered 4–24 hours. Less mess, excellent seasoning penetration, slightly less tangy than buttermilk.
- Pick your pieces: bone-in thighs and drumsticks are the most forgiving (dark meat stays juicy); breasts need careful temperature control to avoid drying. A mix gives everyone their favorite.
Pat the chicken mostly dry before dredging — you want tacky, not dripping. A little surface moisture helps the coating cling.
How Do I Make Crispy Fried Chicken at Home? The Craggy Dredge
The secret to craggy, crunchy crust: texture in the dredge and a double-dip.
- The mix: 2 cups all-purpose flour + 1/2 cup cornstarch (cornstarch is the crispiness booster — it fries up glassier than flour alone) + 1 tablespoon each: kosher salt, black pepper, garlic powder, paprika. Add cayenne for heat.
- The crag trick: drizzle 2–3 tablespoons of your brine liquid into the dry dredge and rub it in with your fingers, creating little clumps. Those clumps become the craggy bits that shatter when you bite.
- Double dredge: brine-wet chicken → dredge → back into buttermilk briefly → dredge again, pressing firmly. Two layers = thicker, crunchier crust.
- Rest the dredged chicken 10–15 minutes before frying. This hydrates the coating so it adheres instead of falling off in the oil.
Serious Eats’ fried chicken guides (J. Kenji López-Alt’s testing is legendary) confirm: cornstarch in the dredge and resting before frying are the two highest-impact technique upgrades.
Frying: Temperature Is Everything
- Oil: peanut oil is traditional (high smoke point, neutral); vegetable/canola works fine. You need 2–3 inches depth in a heavy pot or Dutch oven — heavy pots hold temperature steady.
- Temperature: 325–350°F, verified with a thermometer ($15 — non-negotiable for frying). Too cool = greasy, soggy crust. Too hot = burnt outside, raw inside.
- Don’t crowd. Fry in batches, 3–4 pieces max. Crowding drops oil temperature catastrophically. Let oil return to temp between batches.
- Time: 12–15 minutes for bone-in pieces, turning once or twice, until deep golden brown and 165°F internal (thighs are better at 175°F — dark meat improves with slightly higher temp).
- Drain right: on a wire rack over a sheet pan — NOT on paper towels (they trap steam and soften the crust). Season with a pinch of salt immediately while hot.
Keeping It Crispy (The Part Everyone Skips)
- Wire rack, always. Steam is crispiness’s enemy; elevation lets it escape.
- Single layer. Never stack hot fried chicken — the pieces steam each other soggy.
- Hold in a warm oven (200°F) on the rack if frying in batches — stays crispy for 30–45 minutes.
- Reheating: oven or air fryer at 375°F for 10–15 minutes. Never the microwave (it murders crust).
Safety Notes
Hot oil demands respect: never fill the pot more than halfway, keep a lid nearby (smothers grease fires — never water on a grease fire), keep kids and pets out of the kitchen, and let oil cool completely before handling. If frying feels like too much, oven-“fried” chicken (rack + high heat + a little oil spray on the dredge) gets you 70% there with zero oil anxiety.
The Sides That Deserve the Spotlight
Great fried chicken with sad sides is a missed opportunity. The classics, done right:
- Buttermilk biscuits. Flaky, buttery, and made for sopping. The trick: cold butter, minimal handling, and a hot oven (450°F). Leftover biscuit + leftover chicken = the next day’s elite sandwich.
- Mac and cheese. The baked kind with a proper roux-based sauce — creamy inside, golden top. Sharp cheddar + a little Gruyère for depth. It’s the side people remember.
- Collard greens or green beans. Something green and a little bitter cuts the richness — braised collards with a splash of vinegar, or green beans cooked Southern-style with bacon. Balance matters.
- Coleslaw. Vinegar-based (not mayo-heavy) slaw provides crunch and acidity that resets your palate between bites of rich chicken. Make it an hour ahead so it marinates.
- Perfect rice. Don’t overlook it — fluffy rice with pan-dripping gravy is comfort food royalty, and nailing rice that comes out right every time is a skill that pays off across your whole cooking life.
- Seasoning the dredge. This is where a solid spice collection earns its keep — paprika, garlic powder, cayenne, and black pepper in the flour are non-negotiable; a pinch of celery seed or mustard powder is the “what IS that?” secret.
The make-ahead game plan: brine the chicken the night before; make slaw and mac-and-cheese components ahead; fry in batches 30 minutes before serving and hold in a 200°F oven. Fried chicken night feels chaotic only when everything happens at once — stagger the work and it’s one of the most satisfying meals you can put on a table.
The Practical Takeaway
Crispy fried chicken at home comes down to: buttermilk-brine overnight, cornstarch-boosted dredge with the crag trick, double dredge + 15-minute rest, fry at 325–350°F in uncrowded batches, and drain on a wire rack. Get a thermometer — it’s the difference between guessing and nailing it. Master this once and you’ll never crave the drive-through version again. And if chicken night needs a side, one-pot meals keep the rest of dinner just as easy.


