
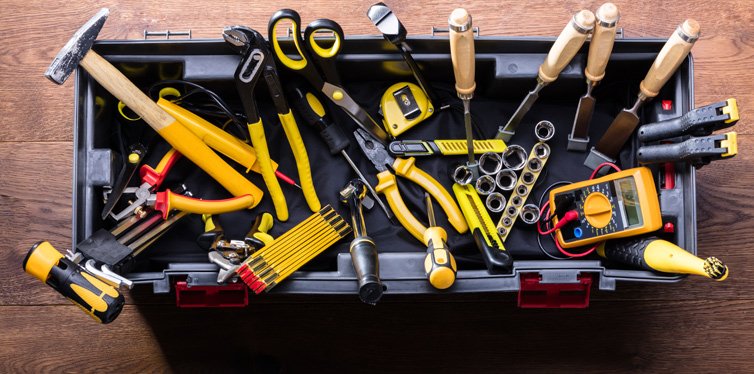
Every homeowner eventually faces the moment: something needs fixing now, and all you own is a butter knife and optimism. Building a basic toolkit doesn’t require a trip to the pro aisle or a four-figure spend. So what tools does every homeowner need in a basic toolkit? About 20 items, roughly $150–$250 total if you buy smart, and they’ll handle 90% of what a house throws at you. Here’s the list, in order of importance.
The Absolute Essentials (Buy These First)
- Claw hammer (16 oz). The icon. For nails, light demolition, and persuading things. A $20–$30 fiberglass-handle hammer lasts decades.
- Tape measure (25 ft). You’ll use this more than any other tool. Get one with a wide blade (1″+) that extends without collapsing — $10–$15.
- Screwdriver set. At minimum: #2 Phillips and a medium flathead. Better: a 6-piece set covering common sizes ($15–$25). You’ll reach for these constantly.
- Cordless drill/driver (12V or 18V). The single most transformative homeowner tool. Driving screws by hand is for masochists. A basic 12V drill/driver kit ($60–$100) handles drilling and driving for most household tasks. Stick with a major brand (DeWalt, Milwaukee, Ryobi, Makita) so batteries are available for years.
- Adjustable wrench (10″). Covers most nuts and bolts without a full wrench set. $15–$20.
- Slip-joint pliers + needle-nose pliers. Gripping, bending, pulling, holding. Two pliers cover most needs ($10 each).
- Utility knife. With retractable blade and spare blades. Opening boxes, cutting drywall, trimming — $10.
- Level (24″ or torpedo). For hanging shelves, pictures, curtain rods. A small torpedo level ($10) fits in a drawer; a 24″ ($20) is more versatile.
- Stud finder. The $15 electronic kind. Hanging anything heavy without finding studs is how drywall disasters happen.
- Flashlight or headlamp. Breakers, attics, under sinks — half of home repair is seeing. A $20 headlamp keeps both hands free.
The Second Tier (Add Within the First Year)
- Hacksaw. For cutting metal, plastic pipe, bolts. $15.
- Putty knife set (1.5″ and 3″). Patching drywall, scraping paint, applying filler. $10 for the pair.
- Caulk gun. A dripless model ($15) makes caulking actually pleasant. You’ll caulk bathrooms, windows, trim — constantly.
- Hex key set (Allen wrenches). Furniture assembly lives and dies by these. A folding set is $10.
- Voltage tester (non-contact). $15. Before touching any electrical box, verify it’s dead. This is safety equipment, not optional.
- Plunger + toilet auger. Own these before you need them at 11pm. Trust me.
- Step ladder (4–6 ft). For ceiling fixtures, high shelves, smoke detectors. A sturdy fiberglass 6-footer ($80–$120) is a lifetime purchase.
- Work gloves + safety glasses. $15 total. Your hands and eyes are worth more than any project.
- Toolbox or bag to hold it all. A $25 tool bag keeps everything findable. Tools scattered across drawers might as well not exist.
What Tools Does Every Homeowner Need in a Basic Toolkit? What NOT to Buy Yet
Resist the shiny stuff until you have a project demanding it. Circular saws, angle grinders, air compressors, and tile saws are wonderful — and they’ll sit unused for years if you buy them “just in case.” The rule: buy tools for projects, not for possibilities. When a project comes up, that’s the time to buy (or rent — rental yards exist for exactly this). The one exception: if you see a great sale on a tool you know you’ll need within the year, grab it.
Buying Smart: Quality Tiers
- Buy once (spend more): drill/driver, tape measure, hammer. You use these constantly; cheap versions frustrate daily.
- Mid-range is fine: wrenches, pliers, levels, hand saws. Decent store brands are perfectly serviceable.
- Cheap is fine: putty knives, utility blades, work gloves, drop cloths. These are consumables.
- Buy sets carefully: 200-piece tool sets look like value but include lots of filler you’ll never touch. A curated 20-piece set from a real brand beats a 200-piece no-name kit.
Family Handyman regularly tests and recommends specific models if you want guidance beyond categories — their tool reviews are practical and honest.
Where to Keep It and How to Maintain It
Keep the kit somewhere accessible — garage, utility closet, mudroom. Not the attic, not the basement corner behind the Christmas decorations. Wipe tools clean after use (especially anything that touched paint or caulk), keep drill batteries charged but not perpetually on the charger, and replace utility blades when they dull — a sharp blade is safer than a dull one. A drop of oil on plier joints yearly keeps them smooth.
Storing It All: Tool Organization That Actually Works
A toolkit scattered across three drawers and the garage floor might as well not exist. The storage system matters as much as the tools:
- One home base. Everything lives in one tool bag or box, in one location. The moment tools develop multiple homes, you start buying duplicates of things you already own.
- The 80/20 bag. Keep a small grab-bag with the true essentials (hammer, tape measure, screwdrivers, pliers, utility knife, level, flashlight) for quick jobs — so you’re not hauling the whole kit to hang one picture.
- See-through beats opaque. Clear parts organizers for screws, anchors, and bits. Label everything. The 30 seconds spent labeling saves 10-minute hunts later.
- Hang what you use standing up. Pegboard for frequently used hand tools in the garage or utility area — visible, accessible, and the empty outline shows what’s missing.
- Battery discipline. One battery platform (all tools same brand/voltage), batteries stored charged but not perpetually on the charger, and a labeled spot for the charger itself. Dead batteries are the #1 reason the drill “doesn’t work.”
- The project box. For active projects, a small tote holds that job’s tools, fasteners, and instructions together. When the project’s done, everything returns to base. No more “where did I put the shelf brackets?”
Maintenance in 5 minutes a month: wipe down tools (especially after paint or caulk), check drill battery charge, replace dull utility blades, and return strays to base. Tools last decades with this minimal care — and a sharp, clean, findable tool gets used, while a dull, dirty, lost one doesn’t. The best toolkit isn’t the biggest; it’s the one you can lay hands on in 30 seconds when something needs fixing now.
The Practical Takeaway
A basic homeowner toolkit is about 20 tools costing $150–$250: hammer, tape measure, screwdrivers, cordless drill, wrenches, pliers, utility knife, level, stud finder, and safety gear first; saws, caulk gun, ladder, and specialty items second. Buy quality on the tools you touch daily, go cheap on consumables, and never buy a tool without a project. With this kit, you can handle hanging, patching, assembling, tightening, caulking, and basic repairs — which covers the vast majority of homeownership. The butter knife can finally retire.


