
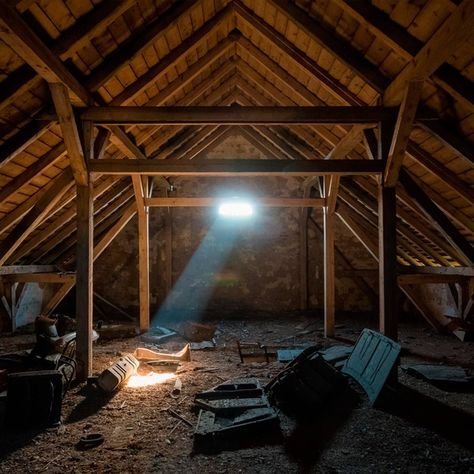
Old houses have character — and drafts. If your heating bills are brutal and some rooms never get comfortable, insulation is probably the culprit: many older homes have little or none in the walls, settled insulation in the attic, and air leaks everywhere. So what is the best insulation for an older home? There’s no single winner — the right choice depends on the area (attic, walls, basement), your budget, and how much disruption you’ll tolerate. Here’s the honest comparison.
The Priority Order (Insulate in This Sequence)
Before comparing materials, know where to insulate first — it matters more than what:
- Attic. Heat rises; an under-insulated attic is the #1 energy loser in old homes. The Department of Energy recommends R-38 to R-60 in attics for most US climate zones (that’s 10–17 inches of blown insulation). This single upgrade often pays for itself in 2–3 years.
- Air sealing. Not insulation, but do it first or alongside — caulk, weatherstrip, and seal penetrations (plumbing, wiring, chimneys) in the attic floor. Air leaks can waste more energy than thin insulation.
- Walls. The big project in old homes — many have empty wall cavities. Dense-pack cellulose or injection foam can fill them without tearing walls open.
- Basement/crawl space. Insulating rim joists and foundation walls makes floors warmer and cuts moisture problems.
- Floors over unconditioned spaces. Last priority, but noticeable for comfort.
What Is the Best Insulation for an Older Home? Material Comparison
Blown-in cellulose — the old-house workhorse
Made from recycled newspaper treated with borate (fire and pest resistant). Best for: attics (blown over existing insulation) and wall cavities (dense-packed through small holes). It’s cheap ($1–$2/sq ft installed), fills irregular spaces beautifully, and suits old homes because it doesn’t require demolition. The borate treatment deters pests — a real plus in old houses. Downsides: settles slightly over decades; must stay dry (wet cellulose loses R-value and can mold).
Fiberglass batts — the familiar default
The pink rolls everyone knows. Best for: open attics and accessible joist bays in straightforward framing. Cheap and DIY-friendly ($0.50–$1/sq ft materials). But batts underperform in old homes with irregular framing, wiring, and plumbing in the way — gaps and compression kill their rated R-value. If your attic has obstacles everywhere (typical old house), blown insulation outperforms batts in practice.
Spray foam (open and closed cell) — the premium option
Closed-cell spray foam (R-6.5/inch) insulates and air-seals in one step, adds structural rigidity, and acts as a vapor barrier — superb for rim joists, basements, and problem areas. Open-cell (R-3.5/inch) is cheaper and good for attics. Downsides: expensive ($2–$5+/sq ft installed), must be professionally installed, and in old homes with no wall vapor barrier, closed-cell foam can trap moisture in wall assemblies — consult a building-science-savvy contractor before foaming old walls. Never DIY spray foam kits for large areas; the chemistry is unforgiving.
Rigid foam boards — the targeted problem-solver
Polyiso or XPS boards (R-5 to R-6.5/inch). Best for: basement walls, rim joists, and exterior sheathing during siding replacement. Precise, predictable, moisture-resistant. Not practical for filling existing wall cavities.
Mineral wool (Rockwool) — the fire-safe upgrade
R-3 to R-4/inch, naturally fire-resistant (melts above 2000°F), water-repellent, and excellent for sound dampening. Best for: walls opened during renovation, basement ceilings, and anywhere fire safety matters. Pricier than fiberglass but nicer to install (less itchy) and performs better. If you’re soundproofing a bedroom, mineral wool in the walls does double duty.
The Old-House Special Considerations
- Knob-and-tube wiring. If your home still has it, do NOT blow insulation over it — it’s a fire hazard. Get an electrician’s assessment first. This is the #1 old-house insulation gotcha.
- Moisture management. Old homes were designed to “breathe.” Adding insulation changes moisture dynamics — always address bulk water (roof leaks, grading, gutters) before insulating, and consider how each assembly dries.
- Plaster walls. Dense-pack cellulose works well in plaster walls (small holes, patched after). Avoid tearing out plaster to insulate — the disruption and cost rarely justify it versus dense-packing.
- Historic considerations. If your home is historic or in a historic district, check local rules before exterior changes like adding rigid foam under new siding.
Cost and Payback Reality
Typical installed costs for a 1,500 sq ft home: attic blow-in $1,500–$3,000; dense-pack wall insulation $3,000–$7,000; rim joist spray foam $1,000–$2,500. Many utilities offer rebates and free energy audits — check yours before paying full price; some cover 50%+ of attic insulation. Payback periods of 2–5 years are typical for attic work, longer for walls. Comfort improvement, though, is immediate — and for many old-house owners, warm floors and draft-free rooms are worth as much as the bill savings.
Insulation and Air Sealing: The Order That Matters
The biggest insulation mistake isn’t choosing the wrong material — it’s insulating before air sealing. Air leaks bypass insulation entirely: fiberglass batts with air flowing through them perform at a fraction of their rated R-value (the “wind washing” effect). The correct sequence:
- Find the leaks. A blower-door test (often included in utility energy audits, many free) quantifies leakage and an infrared scan shows exactly where. DIY version: incense stick on a windy day around attic penetrations, top plates, and chimney chases.
- Seal the attic floor first. Plumbing stacks, wiring penetrations, recessed lights (use fire-rated covers), the chimney chase (metal flashing + fire caulk), and the attic hatch (weatherstrip + insulated cover). Caulk and spray foam are the tools — $50 in materials, enormous impact.
- Then insulate. Now the insulation actually performs to spec, because air isn’t flowing through it.
- Don’t forget the basement. Rim joists (where the house framing meets the foundation) are the most under-insulated spot in most old homes — cut-and-cobble rigid foam + spray foam edges, or have them spray-foamed professionally. Huge comfort payoff for a small area.
The comfort dividend: homeowners consistently report that proper air sealing + insulation changes how the house feels more than the bill savings suggest — fewer drafts, warmer floors, quieter rooms, more even temperatures. It’s the least glamorous home improvement and among the most life-improving, especially when combined with sealing drafty windows and the other high-payback efficiency upgrades. Do the audit, seal the leaks, blow the attic, and enjoy the first winter where every room is actually comfortable.
The Practical Takeaway
The best insulation for an older home is blown-in cellulose for attics and dense-packed walls (best value, no demolition), spray foam for rim joists and targeted air-sealing, and mineral wool where fire safety or sound matters. Always air-seal first, check for knob-and-tube wiring before insulating, and fix water issues before adding anything. Start with the attic — it’s the cheapest, fastest payback in the house — then work down the priority list as budget allows.


