
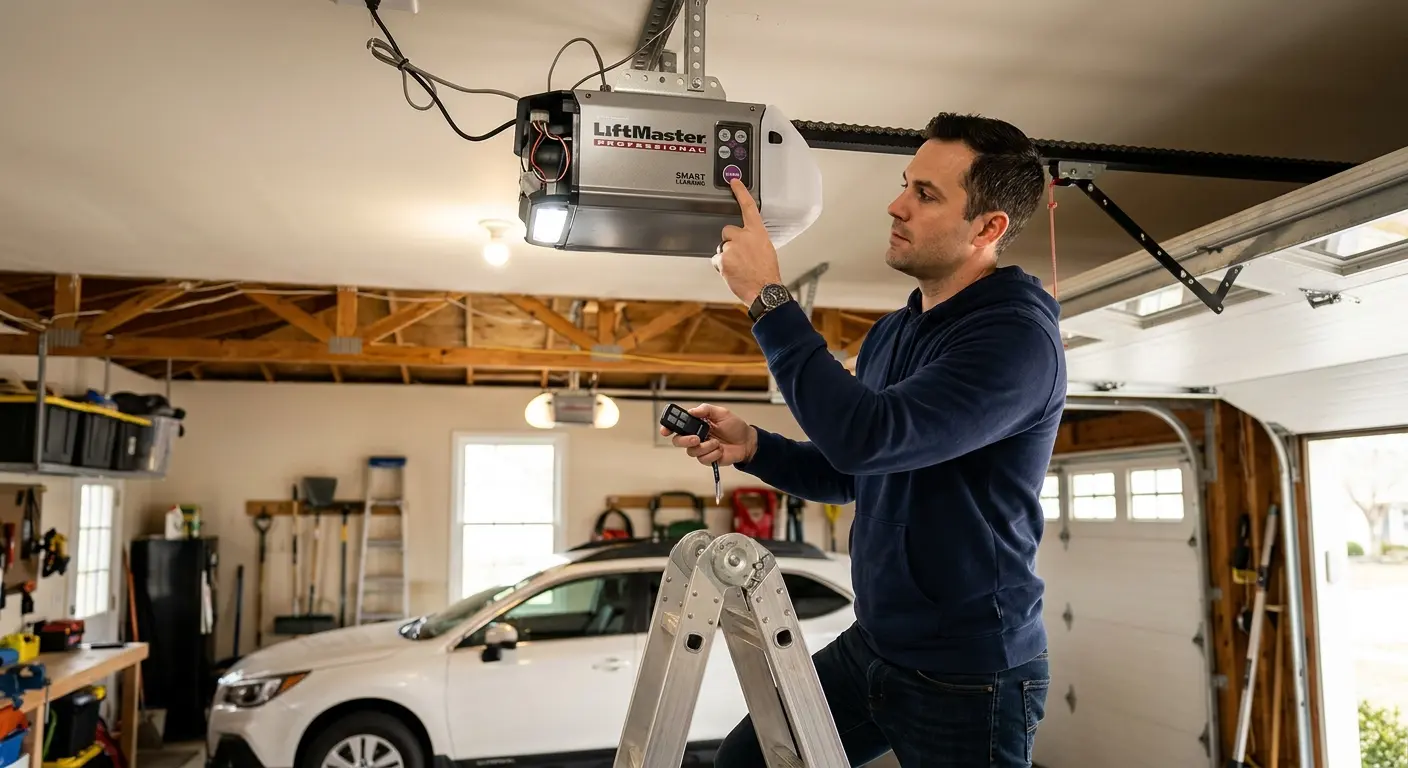
Quick answer: To program a garage door opener, press the “Learn” button on the motor unit, then press the button on your remote within about 30 seconds. The opener will flash or click to confirm, and you’re done. The whole thing takes around five minutes, and you don’t need any special tools.
Why I Wrote This Guide
A few years ago, my neighbor knocked on my door holding a dead remote and a very confused look. He’d bought a new one online, spent an hour pressing buttons, and got nowhere. I walked over with a step stool, found the Learn button in about ten seconds, and had the remote working in under three minutes.
That’s the thing about programming a garage door opener: it’s easy once you know where to look, and frustrating when you don’t. Here’s everything I’ve learned, in plain language.
What You Need Before You Start
You don’t need much. Grab these first:
- A sturdy step stool or ladder
- Your new or reset remote (or keypad)
- Your opener’s model number (usually printed on the motor unit)
- A flashlight, because garage ceilings are dark
Two quick checks save a lot of headaches. First, make sure the new remote is compatible with your opener brand and year. Second, if your remote needs batteries, put in fresh ones. A weak battery is behind more “broken remote” calls than you’d think.
Step-by-Step: How to Program a Garage Door Opener Remote
This method works for most modern openers from brands like Chamberlain, LiftMaster, and Craftsman. Other brands follow a very similar pattern, though button names can differ.
Step 1: Find the Learn Button
Look at the motor unit hanging from your ceiling. The Learn button is usually on the back or side panel, near the antenna wire. Sometimes you’ll need to pop off a light cover to see it.
The button is often colored, and the color helps you identify the type of opener you have. Common colors are yellow, purple, red, orange, and green. Next to it, you’ll see a small LED light.
Step 2: Press and Release the Learn Button
Press the Learn button once, then let go. The LED will light up, and you now have roughly 30 seconds to finish the next step. If you wait too long, the opener stops listening and you’ll need to start over.
Don’t hold the button down. I’ll explain why in the common mistakes section below. Holding it for several seconds can wipe every remote and keypad connected to the opener.
Step 3: Press the Remote Button
Press the button on your remote that you want to use for the garage door. Hold it until the opener’s lights flash or you hear a click. That’s the confirmation that it worked.
Step 4: Test It
Step a few feet away and press the remote. The door should open or close. Try it a couple more times from the driveway, because range can sometimes be an issue if the antenna is tucked away.
If you have a second remote, repeat the same steps for each one. Every remote needs its own pairing.
How to Program a Garage Door Keypad
Keypads are great when kids come home before you do, or when you want to leave the house without keys. Here’s the usual process:
- Press and release the Learn button on the motor unit.
- Within 30 seconds, type a 4-digit PIN on the keypad.
- Press the Enter button.
- Wait for the light to flash or the opener to click.
- Test the keypad by entering your PIN again.
I always tell people to skip obvious codes like 1234 or the last four digits of a phone number. Pick something that’s easy for you to remember but hard to guess.
How to Program Your Car’s Built-In Garage Door Button (HomeLink)
Many newer cars have a built-in system, often called HomeLink, with three buttons near the rearview mirror or on the visor. Programming it takes a few more steps, and it works a little differently.
Step 1: Clear the Old Settings (First Time Only)
Hold down the two outer HomeLink buttons for about 20 seconds until the indicator light flashes rapidly. Only do this the first time you set it up. Don’t repeat it every time you add a new button.
Step 2: Sync with Your Existing Remote
Hold your handheld remote one to three inches from the HomeLink button you want to use. Press and hold both buttons together. Watch the indicator light. It will blink slowly at first, then switch to rapid flashing. When that happens, let go of both.
Step 3: Finish at the Motor Unit
Newer openers use rolling code technology, which means the car also needs to be “taught” directly by the opener. Press the Learn button on the motor unit, then go back to your car within 30 seconds. Press and hold the HomeLink button for two seconds, then release. You may need to repeat this up to three times.
I’ve done this on a few family cars, and the most common problem is running out of time. Have someone help you, or practice the walk first so you’re not rushing.
Older Openers with DIP Switches
If your opener is from the 1980s or early 1990s, you might not have a Learn button at all. Instead, you’ll see a row of small switches inside the remote and on the motor unit. These are called DIP switches.
To program one, open the remote’s battery compartment and look at the switches. Then match the switch positions on the motor unit exactly, up or down, in the same order. When both match, the remote works.
My parents had one of these in their old house. Honestly, it’s simple, but it’s also not very secure, so if you’re still using one, consider upgrading to a rolling code model.
Common Mistakes to Avoid
These are the slip-ups I see again and again. Fixing them usually solves the problem.
Holding the Learn button too long. Pressing and holding it for about six seconds typically erases all stored remotes and keypads. Unless you want a full reset, just tap it.
Taking too long between steps. That 30-second window is real. If the LED goes off before you press the remote, start over.
Buying an incompatible remote. Frequency and technology vary by year and brand. Check your opener’s model number against the remote’s compatibility list before you buy.
Forgetting fresh batteries. I once spent twenty minutes troubleshooting a friend’s remote before checking the battery. It was dead. Check this first.
Standing too far from the opener. Stay close while programming. Distance and metal garage frames can weaken the signal.
Skipping the motor unit on car programming. If your HomeLink buttons light up but the door doesn’t move, you probably skipped the final Learn button step.
Troubleshooting: When It Still Won’t Work
If you’ve followed every step and nothing happens, try these fixes:
- Check the LED color and flash pattern. Your owner’s manual explains what each pattern means.
- Inspect the antenna wire. It should hang straight down from the motor unit. A bent or damaged wire hurts reception.
- Look for interference. LED bulbs, nearby electronics, and even some security systems can disrupt the signal. Try swapping out a suspicious bulb.
- Reset the opener. Clear all stored codes by holding the Learn button until the LED goes out, then reprogram every device.
- Try a universal remote. If your original is no longer made, a universal option can be a good backup.
You can find manuals and model-specific help on the Chamberlain support site or through LiftMaster. Both offer guides by model number.
A Quick Word on Safety
Working on a garage door system is mostly safe when you’re just programming remotes. But the door itself, especially the springs and cables, can be dangerous. Never touch them. If your door is stuck, makes odd noises, or won’t close properly, call a professional.
Also, test the safety reversal feature after you set things up. Place a roll of paper towels or a 2×4 on the ground under the door. If the door doesn’t reverse when it touches the object, stop and get it adjusted. The U.S. Consumer Product Safety Commission offers more information about garage door safety and why these features matter.
Final Thoughts
Learning how to program a garage door opener is one of those small home skills that pays off right away. Whether it’s a new remote, a keypad, or your car’s built-in buttons, the pattern stays pretty much the same: tap the Learn button, then send the signal within 30 seconds.
Take your time, keep your manual handy, and don’t panic if it doesn’t work on the first try. Most of the time, it’s a battery or a timing issue. And if you get stuck, your opener’s model number plus a quick search will almost always get you the exact steps you need.
Frequently Asked Questions
1. How do I program a garage door opener without a Learn button?
Check for DIP switches inside the remote and on the motor unit, and match the switch positions exactly. Some newer openers use other buttons, such as Program or Smart, so check your manual if you’re unsure.
2. How long does it take to program a garage door opener?
Usually about five minutes. A basic remote takes just a minute or two, while a car’s HomeLink system can take a bit longer.
3. How do I reset my garage door opener?
Press and hold the Learn button until the LED turns off, usually around six seconds. This erases all remotes and keypads, so you’ll need to reprogram each one afterward.
4. Can I program any remote to any garage door opener?
No. The remote must match your opener’s frequency and technology. Universal remotes cover many brands, but always check compatibility first.
5. Why won’t my garage door remote program?
The most common causes are a dead battery, an incompatible remote, a missed 30-second window, or signal interference. Check these before anything else.
6. How do I change the code on my garage door keypad?
Press the Learn button on the motor unit, then enter your new 4-digit PIN on the keypad and press Enter within 30 seconds. Test it right after.
7. Do I need to reprogram my remote after changing the battery?
No. The remote keeps its pairing when you swap batteries. If it stops working afterward, the battery is probably installed wrong or the remote has a separate issue.
8. How many remotes can one garage door opener have?
It depends on the model, but many openers store several remotes and keypads. Check your manual for the exact limit.


