
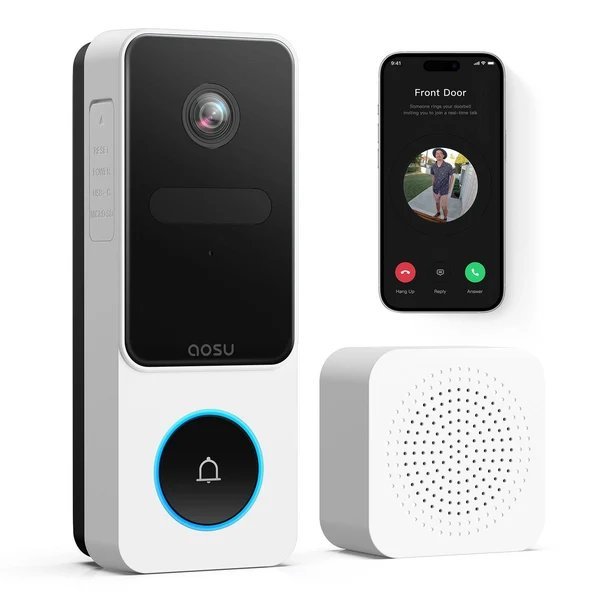
You want the video doorbell, but ripping out your perfectly good old chime feels wasteful. So how do I set up a smart doorbell with my existing chime — and which ones even allow it?
So, how do I set up a smart doorbell with my existing chime? I went down the rabbit hole on this one so you don't have to. Here's everything worth knowing, minus the fluff.
The Bottom Line Up Front
Most wired smart doorbells (Ring Video Doorbell Pro, Google Nest Doorbell wired, Eufy wired models) work with existing chimes — they use your current 16–24V transformer wiring. First, check your transformer voltage (printed on the unit, usually in the basement or closet) and confirm your chime is mechanical, not digital. Installation: turn off the breaker, connect the doorbell wires to the new unit, configure chime settings in the app, and restore power. Battery models skip wiring entirely but need recharging every few months.
That's the gist, but the details matter here — they decide whether you overpay, waste time, or get it right the first time.
Worth a read next: How do I mirror my laptop screen to a smart TV.
For the official word, check Ring's official doorbell compatibility checker, which lays out the details straight from the source.
How Do I Set Up a Smart Doorbell With My Existing Chime? Step by Step
- Check transformer voltage first: 16–24V AC works with most smart doorbells; older 10V transformers need upgrading ($15 part).
- Here's the thing — Mechanical chimes (the classic 'ding-dong') are universally compatible; some digital chimes need an adapter.
- What surprised me: Turn off the breaker before touching any wires — doorbell circuits are low voltage but the transformer isn't.
- Pay attention here: In the app, enable 'existing chime' so the smart doorbell rings your indoor chime plus your phone.
- Weak WiFi at the front door is the #1 cause of doorbell problems — test signal strength before mounting.
What This Looks Like in Practice
I installed a wired doorbell on my 1990s chime in about 40 minutes. The only snag: my transformer was 10V, so I swapped in a $16 24V transformer from the hardware store. Total cost under $120, and the old 'ding-dong' still rings alongside the phone alerts.
Wired vs. Battery: The Real Trade-offs
Let’s talk about the DIY-versus-pro question, because it comes up constantly. The internet makes everything look easy — a ten-minute video, a $20 kit, and you’re supposedly set. Sometimes that’s genuinely true. But the videos never show you the three hours of troubleshooting, the stripped screw, or the part that arrives broken. My rule of thumb: if a failed DIY attempt would cost you more than the pro would have charged in the first place, just hire the pro. Your time has value, and so does your sanity.
That said, there’s real satisfaction in fixing something yourself, and plenty of tech tasks are genuinely beginner-friendly once you know which ones. The trick is matching the job to your actual skill level, not the skill level of the YouTuber who does it for a living. Start small, read the comments (that’s where the real warnings live), and have a plan B before you open anything up.
Timing matters more than most people realize. Tech prices follow rhythms — new models drop in predictable seasons, and the previous generation gets discounted right after. If you can wait six to eight weeks, you can often get last season’s flagship for the price of this season’s mid-range option, which is almost always the better deal. Refurbished and open-box items follow a similar pattern, flooding the market right after big launches.
The other timing trap is buying right before you actually need something. Gadgets sitting in a drawer lose value and warranty coverage simultaneously. Buy when you’re ready to use it, not when the deal looks shiny. And if a salesperson is pushing hard, that’s information too — it usually means the margin is good for them, not the value for you. Sleep on any tech purchase over a couple hundred bucks. You’ll thank yourself.
You might also want to check out How do I set up parental controls on my child's tablet.
Smart Moves to Make
- If you remember one tip from this list, make it this: photograph the existing wiring before disconnecting anything — you'll thank yourself later.
- If you remember one tip from this list, make it this: if your transformer is buried and inaccessible, a battery model avoids the whole issue.
- This one's easy to overlook: subscribe or not? Decide based on whether you need video history — live view is usually free.
- Don't skip this: angle the doorbell slightly toward the walkway, not straight out, for the best motion detection.
Don’t Learn These the Hard Way
- Here's a painful one: skipping the transformer check and wondering why the doorbell won't power on. Learn from other people's mistakes on this.
- The classic blunder: mounting it where WiFi barely reaches, then blaming the doorbell. I've seen this one cost people time and money more times than I can count.
- Here's one I see constantly: forgetting to turn the breaker back on and troubleshooting a 'dead' doorbell for an hour. Don't let it happen to you.
Things People Also Ask
Can I do this myself, or should I get help?
It depends on your comfort level and what's at stake. Low-risk tasks with good tutorials are great DIY candidates. But if messing up would cost you the device, your data, or your warranty, that's the moment to call in someone experienced. There's no shame in it — pros exist for a reason, and their mistakes are their problem, not yours.
What's the biggest mistake beginners make?
Rushing. People either buy the first option they see or dive into a fix without reading the instructions twice. Slow down, compare at least three options, and read the fine print — especially around warranties, return windows, and what's actually included. Ten extra minutes of patience routinely saves hundreds of dollars.
How do I know I'm getting a fair price?
Get three quotes. It's the oldest advice in the book because it works. You'll quickly see the going rate, and outliers in either direction tell you something — suspiciously cheap often means corners cut, while the priciest option isn't automatically the best. Ask what each quote includes so you're comparing apples to apples.
Final Thoughts
Your existing chime almost certainly works with a wired smart doorbell — just verify the transformer voltage first. Forty minutes of careful work buys you years of knowing exactly who's at the door.
You don't need to become an expert here — you just need enough to make a smart call and move on.
Worth a read next: Can I use a Bluetooth speaker with my smart TV.
One more useful resource: Google Nest doorbell support — worth bookmarking before you make any final decisions.


