
Professional photo editing used to mean years of Photoshop practice. Now AI handles the technical heavy lifting — and the photographer’s eye matters more than ever. Here’s how to use AI to edit your photos like a pro, even if you’ve never touched editing software: the tools, the workflow, and the judgment calls that separate stunning from overdone.
How Do I Use AI to Edit My Photos Like a Pro? The Tools
Phone editors with AI: Google Photos and Apple Photos now include AI enhance, magic eraser (remove photobombers with a tap), and portrait relighting. For most people, this is enough — the AI in your pocket handles 80% of editing needs.
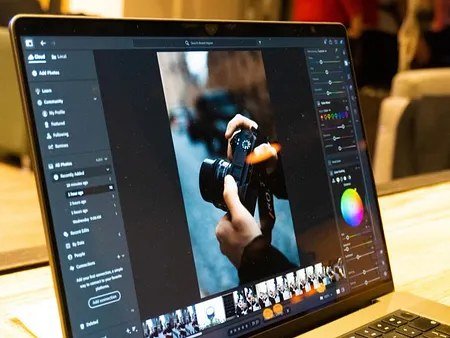
Lightroom (mobile free, desktop paid): The professional standard, now with AI masking that selects skies, subjects, and backgrounds automatically. What took ten minutes of careful brushing takes one tap. The free mobile version is remarkably capable.
Adobe’s AI features: Generative fill in Photoshop — select an area, describe what should be there (or what shouldn’t), and AI rebuilds it seamlessly. Removing a trash can from a wedding photo used to be skilled labor; now it’s a sentence. Adobe’s AI editing features lead the industry here.
Specialized AI tools: Topaz for upscaling and noise reduction (rescue blurry or old photos), Luminar for one-click sky replacement and portrait enhancement. Niche but powerful for specific problems.
The Pro Workflow (In Order)
Pros edit in a sequence — and order matters:
- 1. Cull ruthlessly. Pick the best 10%, ignore the rest. Editing can’t save a bad photo; it can only improve a good one.
- 2. Fix globally first: straighten, crop, adjust exposure and white balance. Get the foundation right before details.
- 3. AI cleanup: remove distractions (magic eraser), reduce noise, sharpen. The boring technical fixes AI does best.
- 4. Selective enhancements: AI masks for sky, subject, background — adjust each independently. Darken skies, brighten faces, add depth.
- 5. Color and mood: presets as starting points, then adjust. This is the taste step — warm and golden? Cool and moody? Match the feeling, not a trend.
- 6. Final check: view at full size, check skin tones look human, ensure nothing looks over-processed.
The Judgment Calls (What AI Can’t Do)
Here’s what separates pro results from AI-slop: restraint. The most common beginner mistake is over-editing — maxed-out clarity, radioactive saturation, skin smoothed into plastic. AI makes it easy to go too far; taste is knowing when to stop. Compare against the original frequently. If you can’t tell what changed at a glance, you’re probably in the right zone.
Also: authenticity matters more than perfection. An honest photo with character beats a technically flawless one that feels fake — which connects to spotting AI-generated images. Viewers increasingly distrust the over-processed look. Edit to reveal the photo’s best self, not to manufacture a different photo.
Before and After: What Good AI Editing Actually Looks Like
Let’s make this concrete — typical edits and what separates tasteful from overdone.
Scenario 1: The backlit portrait. Before: face in shadow, sky blown out. AI fix: subject mask brightens the face naturally, sky mask recovers cloud detail, slight warmth added. Good: face looks naturally lit, sky has texture. Overdone: face glowing like a flashlight, sky turned apocalyptic orange. The line: does it look like better light or like a different reality?
Scenario 2: The distracting background. Before: great moment, trash can photobombing. AI fix: generative fill removes it, reconstructing the background seamlessly. Good: you’d never know it was there. Overdone: the fill invents weird architecture or warps nearby objects — zoom in to check. Always inspect AI fills at 100%; they’re convincing at thumbnail size and occasionally surreal up close.
Scenario 3: The dull scenery. Before: flat midday light, hazy. AI fix: dehaze, sky enhancement, color grading toward golden hour. Good: vibrant but believable — looks like a great day. Overdone: radioactive saturation, HDR halos around every edge, colors that don’t exist in nature. The test: would someone who’s been there say “beautiful day” or “that’s not what it looked like”?
The universal principle: Edit toward the memory of the moment, not away from reality. Our brains remember scenes more vividly than cameras capture — good editing closes that gap. Bad editing creates a gap in the other direction, into uncanny unreality. When in doubt, dial it back 20% from what looks “perfect” on screen. Screens lie; print doesn’t. And the best edit is often the one nobody notices — they just think you’re a better photographer than you are. That’s not deception; that’s craft.
AI Photo Editing FAQs
Will AI editing make my photos look fake?
Only if you let it — the tools default toward enhancement, and restraint keeps results natural. The “fake” look comes from maxed sliders, not from AI itself. Edit toward the memory of the moment (slightly more vivid than the raw capture), stop before it looks processed, and compare against the original often. Taste is the guardrail; AI is just the engine.
What’s the best free AI photo editor?
Google Photos / Apple Photos built-in AI (already on your phone, genuinely capable), Lightroom Mobile free tier (professional-grade selective editing), and Canva (quick enhancements + design). This trio covers 95% of needs at zero cost. Paid tools earn their place for specific problems (Topaz for rescue jobs, full Lightroom for volume).
Is AI-edited photography “cheating”?
Photography has always involved editing — darkroom dodging and burning were the original “AI enhance.” The honest line: editing that reveals what was there (exposure, color, cleanup) vs. editing that invents what wasn’t (adding elements, changing scenes). The first is craft; the second should be disclosed when it matters (journalism, evidence, listings). For personal art, your call.
Learn by Deconstructing
The fastest way to develop editing taste: find photos you love and figure out what the editor did. “The shadows are lifted, the greens are desaturated, there’s a warm tone in the highlights.” Try to replicate it. AI tools make experimentation instant — and AI image generators can even create practice material. Within weeks of deliberate practice, your phone photos will look noticeably professional. The AI does the labor; you supply the eye. That division of labor is the whole secret.


